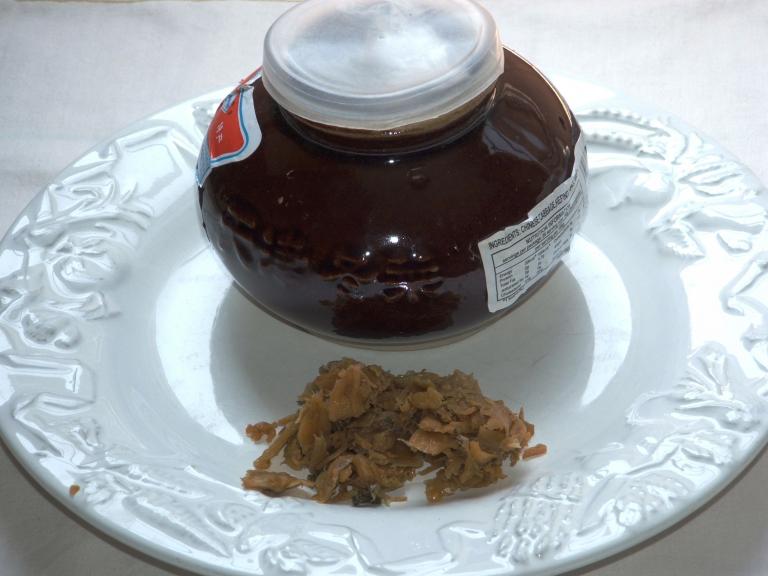
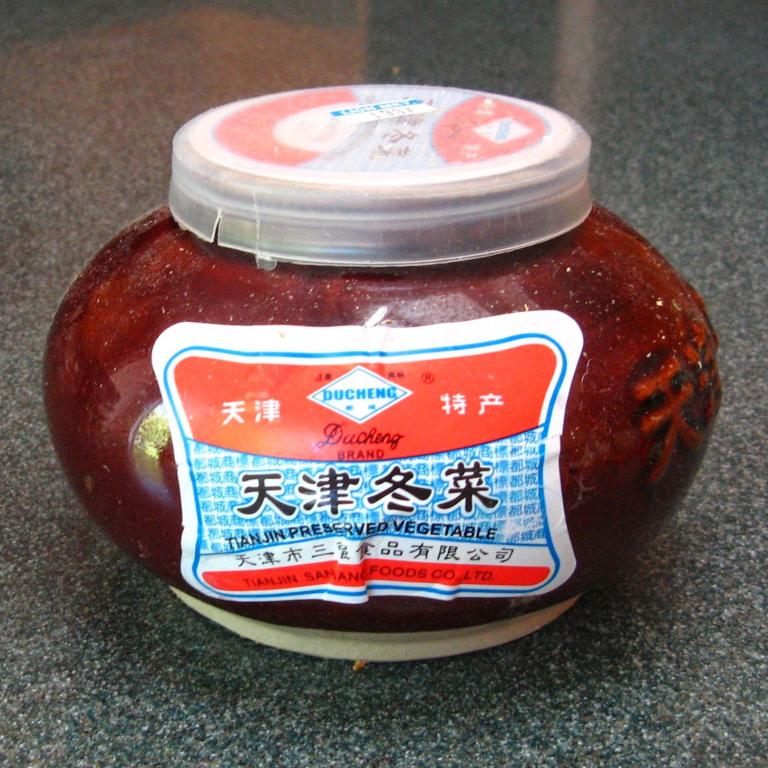
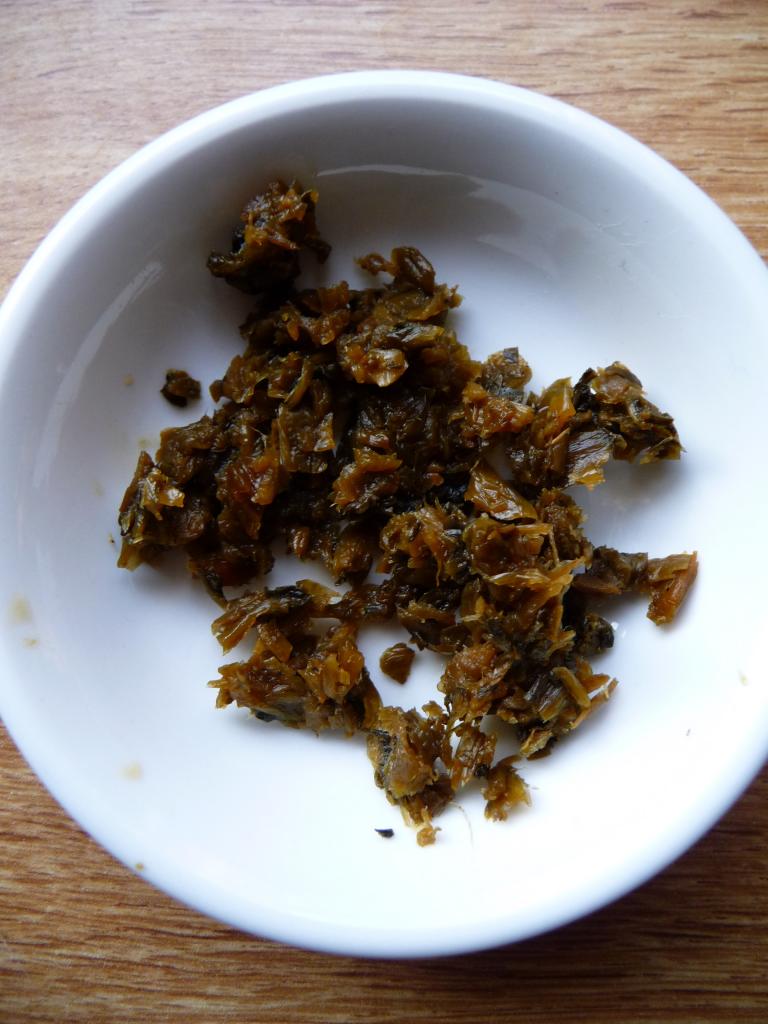
Tianjin Preserved Vegetable
5 min readThis pickle is much less salty than the store-bought version, and has incredible sour flavor. You begin with what appears to be a boatload of cabbage, ferment it with garlic until it’s sour and pungent, and then dry it out to make a much smaller amount of supersour condiment, which you can then use to flavor soups and stir-fries. Drying it really concentrates the flavors, but I invite you to also enjoy this pickle krauted before it hits the drying oven. Note that fermentations like this work best in the cooler months; the cooler temperatures slow down the fermentation process and help prohibit unwelcome mold. Oh, and why am I so picky about the cabbage being fresh? That means it has the liquid necessary for a stable fermentation. Choose cabbage and bok choy that appear heavy for their size; this means there’s more liquid inside.
Makes about 1¾ cups
TIME: ABOUT 2 WEEKS
1 pound 3 ounces very fresh napa cabbage (about a quarter of a large cabbage, tough outer leaves removed), finely chopped
7 large cloves garlic, sliced thinly
2 tablespoons fine-grain sea salt
2 pounds very fresh bok choy, finely chopped
In a large bowl, combine the napa cabbage with the garlic. Measure the salt out into a small bowl. Using a large and freshly cleaned pickling crock, the ceramicinsert to a slow cooker, or a glass jar large enough to hold all of the contents snugly, pack in about a quarter of the bok choy very tightly and sprinkle just a little of the salt on top. (Note that you should use a little more salt for each subsequent layer, and that you will have six layers to salt; make sure you end up with about a third of the salt left to cover the top.) Follow suit with the remainder of the bok choy in three more layers, continuing to pack the crock down very tightly as you go and adding a small amount of salt to each layer. Then pack in half of the napa cabbage and garlic mixture and salt it, then the remaining cabbage and garlic. Sprinkle the remaining salt on top, paying particular attention to the edges where the vegetable meets the crock.
Now you’re going to abuse the cabbage fiercely. Smash the contents of the crock with a clean blunt object—such as a wooden mallet handle, the bottom of a wine bottle, or the end of a French rolling pin—repeatedly for 5 to 10 minutes, until the cabbage feels very, very wet. The motion should be a downward hit of force to compress the cabbage. You’re not mixing it, but bruising it to get it to give up some of its juice. I promise you won’t hurt the cabbage’s feelings. Keep smashing and taking out your aggressions until the liquid from the cabbage surfaces when you press on it with an open palm.
Pack the cabbage down into the crock as tightly as you can and cover it with a drop lid that fits inside your vessel but does not touch the sides. Weight the lid with 2 pounds (try using clean rocks or glass jars full of water) and give it about 10 minutes. The drop lid should be completely covered in liquid before proceeding. If not, bruise the cabbage again, repack it, weight it, and check for liquid again. Cover the whole assemblage (cabbage, lid, and weight) with a secured, clean kitchen towel to keep out insects and debris. Let your crock sit in a cool place while it ferments; peek under thetowel and check the crock daily. It should develop a quite pleasant fermented odor and there should continue to be liquid at the top. If small bits of viscous, white, or green mold appear, simply scrape them off and discard. If any pink or fuzzy mold appears, discard the whole crock full of cabbage and start again with a very clean crock. Allow your pickle to ferment for about two weeks or until you’re satisfied with its fermented aroma and flavor. At this point, you have a delicious kraut that is ready to eat, and can be refrigerated in sealed containers for storage. Kept cold, this kraut will last (continuing to ferment slowly), for about 2 months.
For this pickle, however, we’re going to take one more step and drain and dry the kraut. Preheat your oven to 200°F. Use a slotted spoon to transfer the kraut (without its juice) to an 8 by 8 inch baking dish (I strongly encourage you to reserve the remaining fermented liquid nectar for drinking or use it as a brine to start another batch of krauted pickles—simply pour it over chopped vegetables until fully submerged and keep refrigerated for a week. Stored on its own in the fridge, this liquid will last almost indefinitely). Place the dish on the lowest rack of the oven and keep the oven door open slightly (you can prop it with the handle of a wooden spoon). Allow the pickle to dry out for about 3 hours, then stir; you’ll notice that it will begin to turn slightly beige. This is expected. Dry for 3 more hours, stirring again, then 3 hours more until it is beige all over, but still quite moist and pliant.
Let the pickle cool and then pack it tightly into a jar or other container for refrigerator storage. It is ready to eat and it will keep for at least a year.
USING A DROP LID
Like other Asian pickles, Chinese pickles are sometimes covered with a weighted drop lid that does not touch the edges of the container. The drop lid helps the vegetables slowly and gently compress as they release their liquid and the lid lowers along with them, giving them a crunchier texture. (The resulting liquid is usually discarded, but some like to use it as a flavored, salty component in marinades.)
You can buy wooden drop lids (as well as pickling vessels) made especially for pickling, but this is not necessary. For a pickling bowl or bucket, try the ceramic insert of your slow cooker, or a clean large glass jar (even a scrubbed-clean vase or fish bowl with a wide mouth) will work. The drop lid just needs to fit inside the container—you could try a plate, the lid to a food storage container, a saucer for a flowerpot (clean and wrapped in plastic wrap), or a saucepan lid. Weights placed atop a drop lid allow you, the pickle maker, a lot of control over the rate of the pickle’s compression. Again, special weights can be purchased, but why bother? Cans or bottles from your pantry, or even rocks, can be used: weigh them on a kitchen scale to find the object or combination of objects that will give you the weight designated in the recipe.